
There are many sites on the web which describe the production of GRP parts very thoroughly. But our R2D2 is not heavily dynamically stressed, so fortunately we do not need to make any complicated calculations for laminates.
A problem, that nearly all hand laminates have are open air bubbles on the surface of the parts. These parts must be primed and filled before finishing with lacquer. Usually this preliminary work takes much longer than the actual painting. In order to make the bubbles more visible, I now use only dyed Gelcoats.
|
The surface layer (Gelcoat) The first layer is called the Gelgoat. This is necessary, since otherwise the design and the structure of the fabric would be recognizable in the surface of the part. Furthermore it makes laminating easier, because the fabric remains correctly bonded in difficult places, too. This layer is laid on by one-way or laminating brushes in 2 - 3 layers. Depending upon the temperature and type of resin used, the drying periods between the layers are different, some 1 - 2 hours. You can buy finished Gelcoat or you can make it from the resin that you need anyway for laminating. In this case you should add some Thixotropy-enhancing agent, an amorphous silicic acid which is a thickening agent, to a finished resin mixture. With 100 g resin you need approximately 6 g of Thixotropy-enhancing agent and approximately 1g of colouring paste. Self-manufactured Gelcoat has the following advantages:
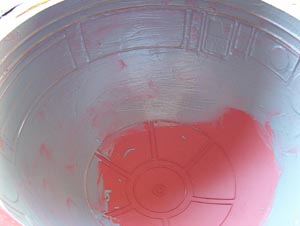
The picture shows the still unfinished first layer of a grey dyed homemade Gelcoat.
|
|
|
Deep undercuts Deep undercuts cannot be laid out with fabric. They have to be "smoothed" after laying on the Gelgoat. For this I used resin, cotton flakes and 3-mm chopped glass fibre strands in the ratio 10g: 1g: 5g. This mixture has a sticky consistency and is suitable to smooth off the undercuts.
|
 |
|
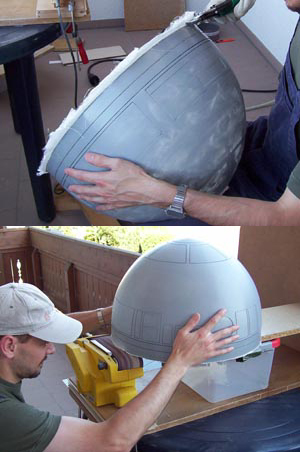
Kinds of fabrics Laminates should be symmetrically developed, thus, you start with a light fabric, increase the weight of the fabric up to the centre layer, and then carry on in reverse order, until you finish with the light fabric at the end again. Since our GRP parts do not have to fulfil high mechanical requirements, I mostly make three-layered GRPs. The first and last layer consists of glass filament fabric (80g/m²), the middle layer from glass pile textile fabric (400g/m²). Here it is important to note the kind of weave the fabric has. For our parts "linen weave" is not suitable. I used only fabrics with a "twill weave", because this kind of weave is simply the best for our "curved and angular" parts. The picture shows the start of laminating the second layer of glass pile textile fabric. The first layer of glass filament fabric has already been laminated. |
 |
|
Basically you laminate "beyond the edge" and after hardening you remove any surplus material with tin snippers and sand off the remainder carefully. |
 |