
Internal bubbles are one of the biggest problems in model construction. A complete internal bubble in GRP- or a PU-part is not too much of a problem, because it is no longer visible after finishing with lacquer and it also doesn't have a negative effect on the strength in most model constructions or applications. Completely enclosed bubbles in a silicon mould may produce bulges on the parts. You do not need throw away these silicon moulds! Simply prick two small holes into the bubble. Then fill a small medical syringe with some silicon and squirt it into one of the two holes. Now fill the bubble with silicon and the air will escape from the second hole. Note that you should not overfill the bubble, otherwise you will get dents on the finished parts as a result.
|
Unfortunately "open" bubbles often occur on silicon moulds as well as on GRP- or PU-parts. If there are such bubbles in the silicon mould these often will "be cast", so that there are small balls approximately 1-3 mm in diameter in the finished parts. These can be usually simply removed by a knife or sandpaper, but they do have a detrimental effect on the life expectancy of the silicon mould.
|
 |
|
To avoid bubbles in the silicon I thoroughly recommend an efficient vacuum pump and a dehydrator (a glass device used to remove moisture). After the two components of the silicon are mixed, if possible avoiding too many bubbles, the mixture is then put into the dehydrator. Next, a strong vacuum of approximately 10 - 20 mbar absolute, is produced by the attached vacuum pump. This causes the bubbles in the silicon to become larger and float to the surface. After few minutes the silicon becomes noticeably bubble free and is ready for use.
|
 |
|
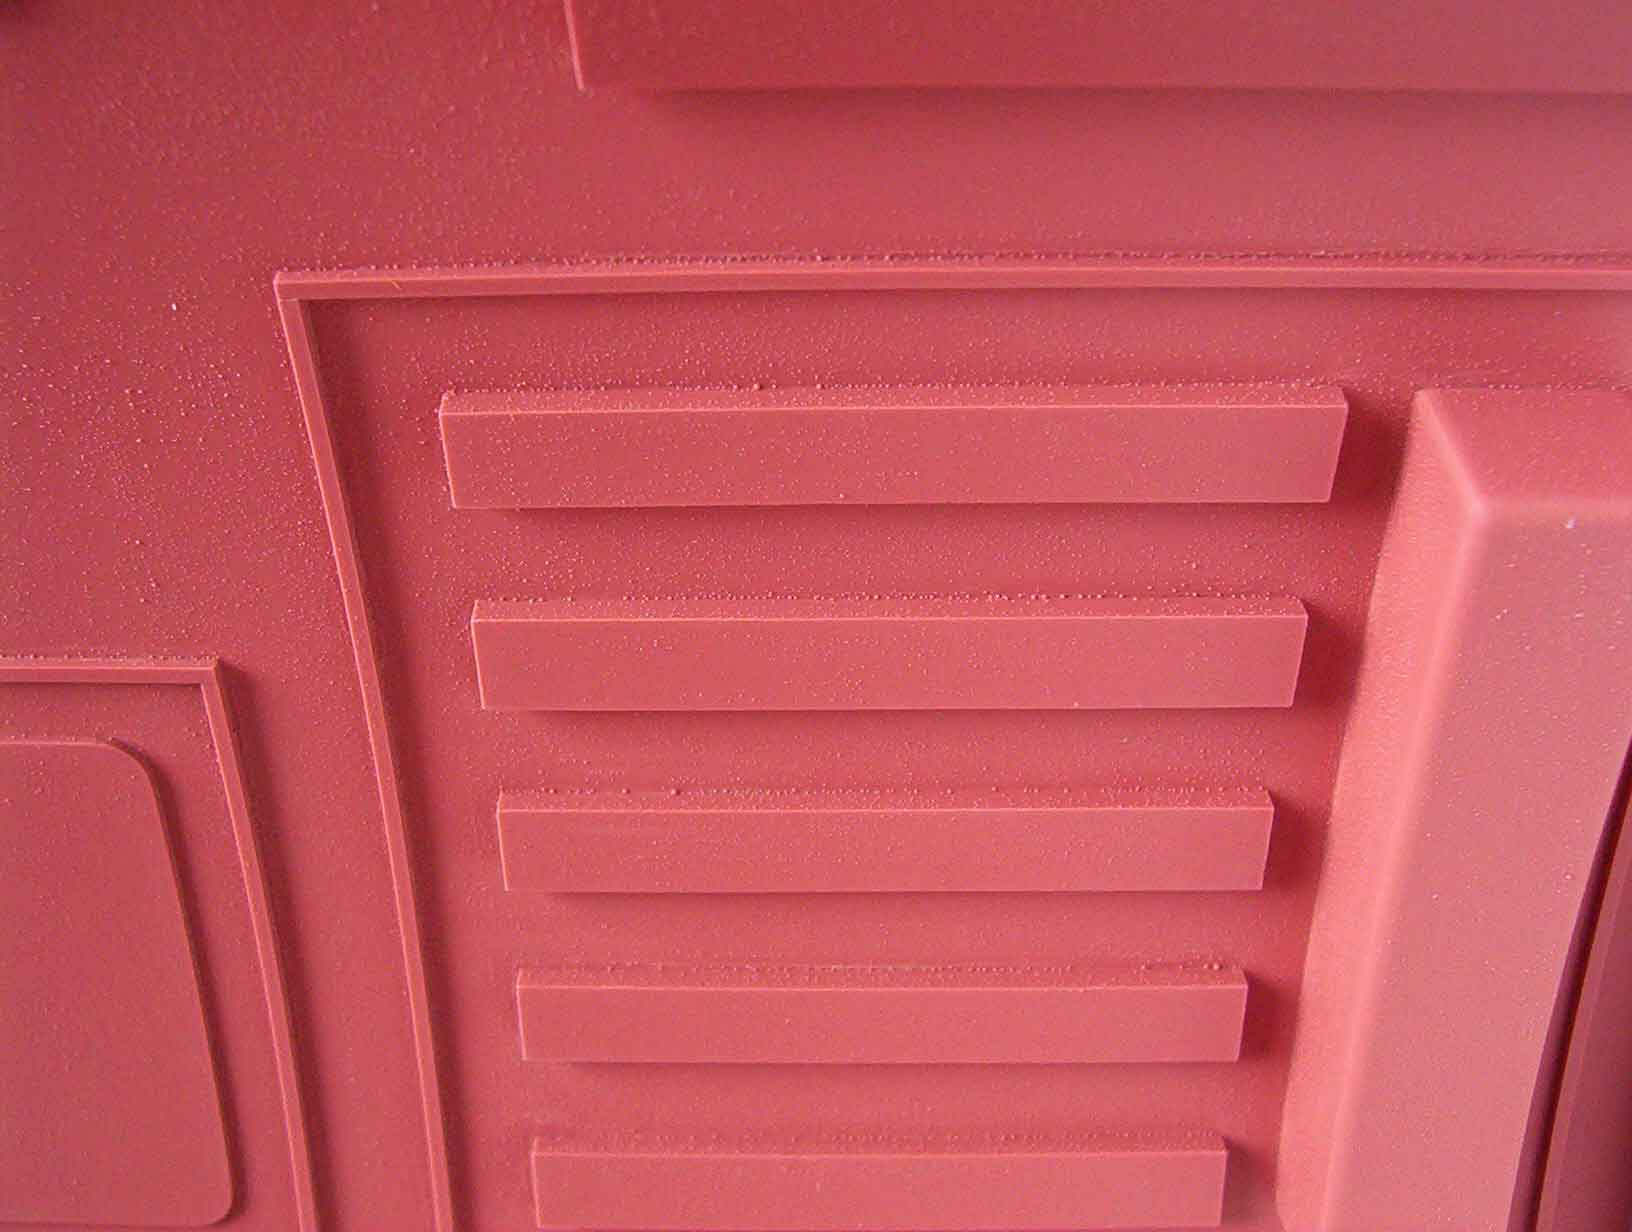
Now we come to open bubbles in GRP or PU parts which are by far the worst types of bubbles. These often occur at edges, corners and depending upon the silicon mould also in straight surfaces. The picture shows the silicon mould of the Body, which unfortunately cast all the open air bubbles from the GRP master model. Consequently all further GRP parts had twice as many open bubbles which involved an enormous amount of additional “putty” work. |
 |
|
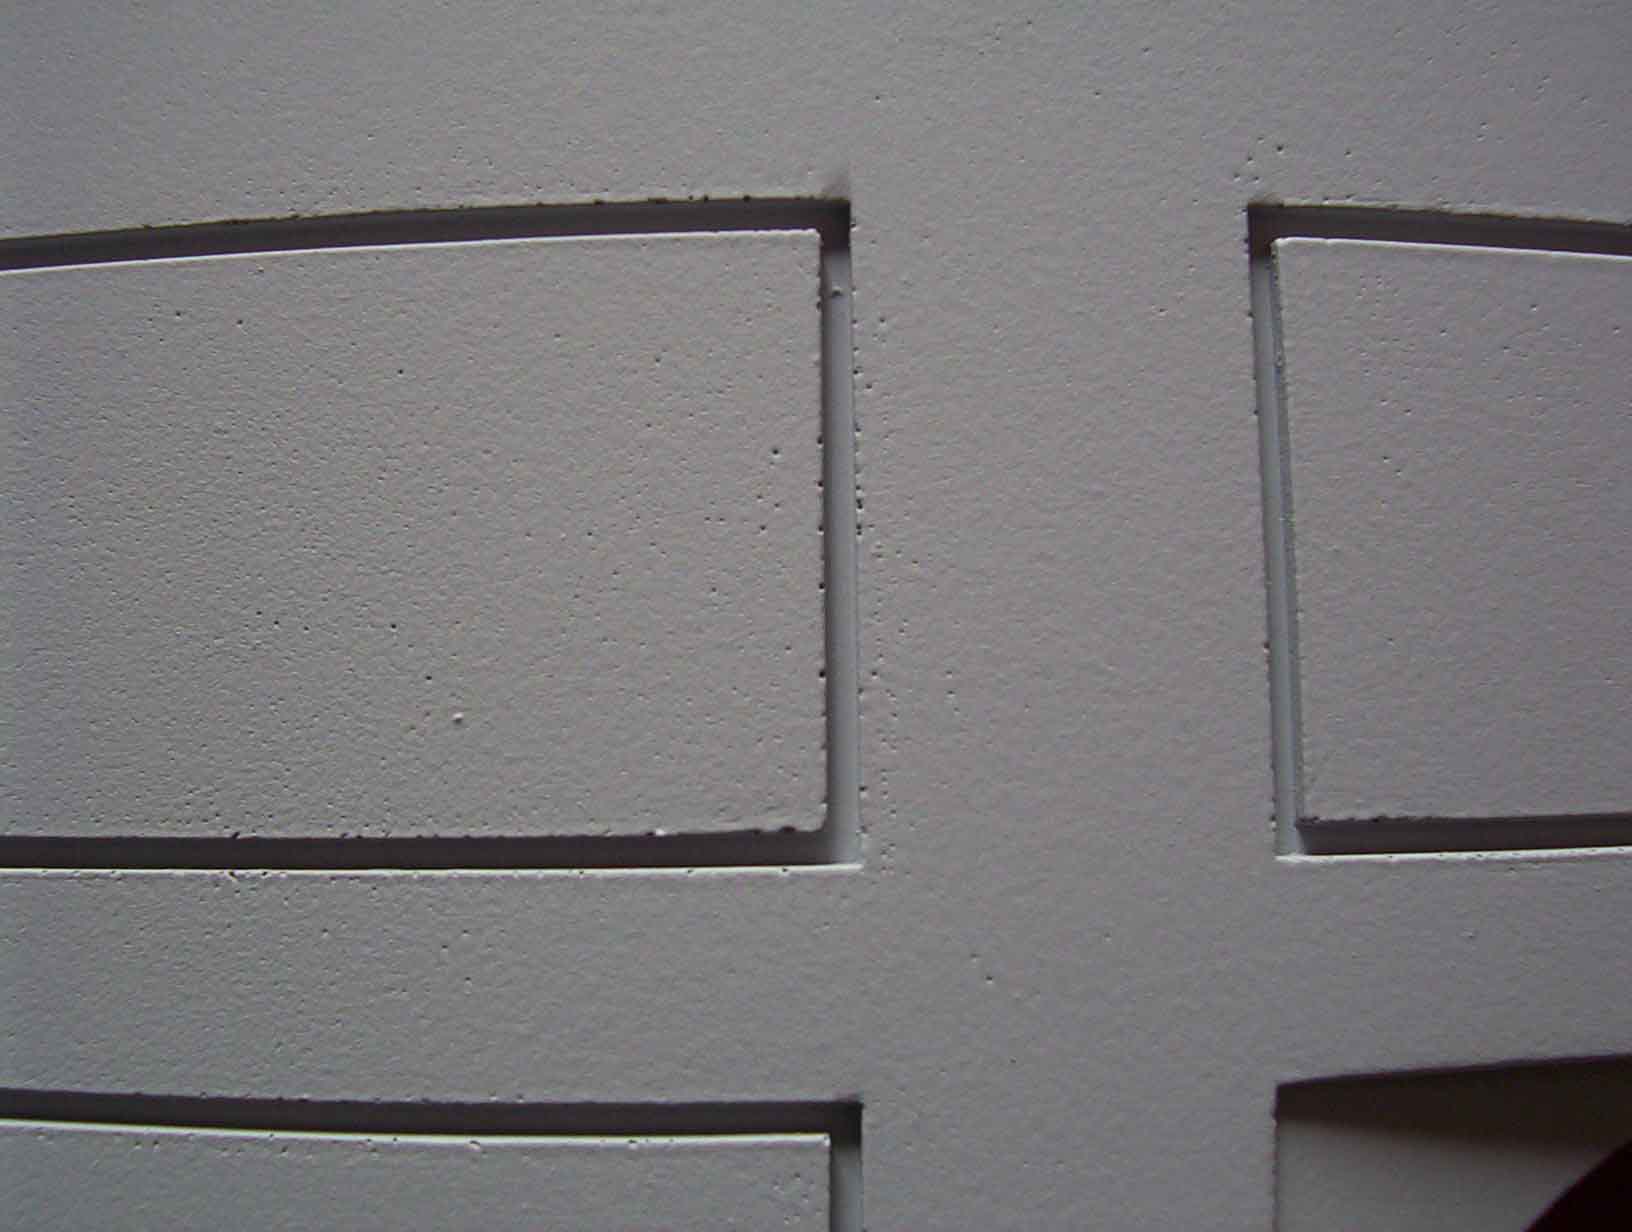
These air bubbles must be painstakingly filled and although the larger bubbles can be filled using epoxy-filler, the smaller ones almost drive you to despair. On the one hand they are too small to be able to be filled with a screeding compound but on the other hand they are too large to be covered with a colour spray or filler. I used a spray filler of DupliColor and this improved the result, but was still very time intensive. If anyone knows an easy way of closing these small holes, please contact me! On dark painted parts such as the Booster Cover, you can hardly see the open bubbles on the surface. Unfortunately, on lightly painted parts, such as the Body, the open bubbles are clearly visible as countless small black points. The time needed for this “putty” work should not be underestimated. “Putty” work ranging from days to weeks, for the larger parts, is the norm. Those who nevertheless try to fill the holes using only colour can watch, as immediately after spraying, there is a build up of the dreaded and unbelievably ugly "drip streaks" in the lacquer!!! Picture: After the first “putty” work and filling using a spray filler there are still millions of holes visible! |
 |
|
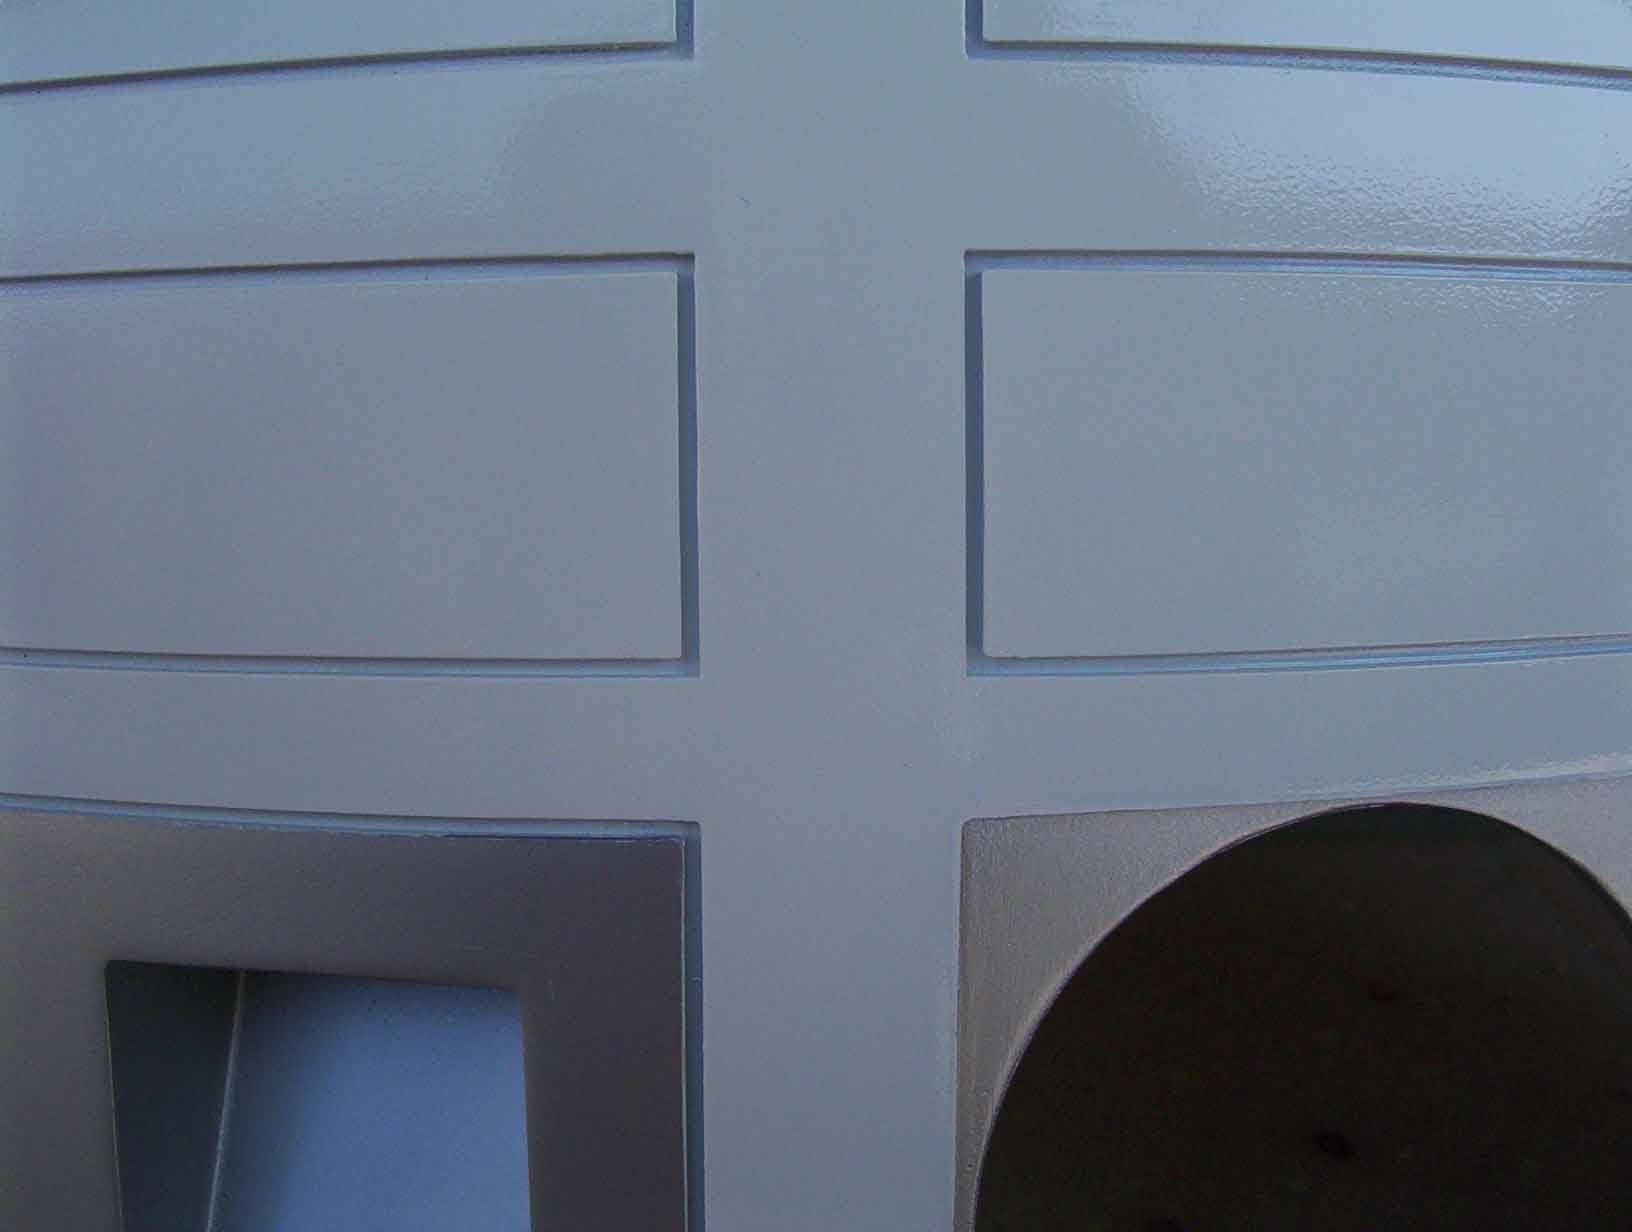
After weeks of priming the result is visibly a huge improvement. |
 |
|
Unfortunately, after the lacquer finish has been applied you no longer see the whole “time and effort” as it is now covered under the paintwork. |
 |